How I migrate site on AWS CloudFront and decrease response time more than 60%
I own a VPS on Hostinger that hosted this site and my wiki so I decided to move to AWS Cloudflare for 3 reason:
- Decrease response time (now is 20 ms);
- Move on a cheaper solution (I know, AWS is not cheap but for static website is closely free)
- Learn AWS cloud technology (the more important reason)
This is how I migrate.
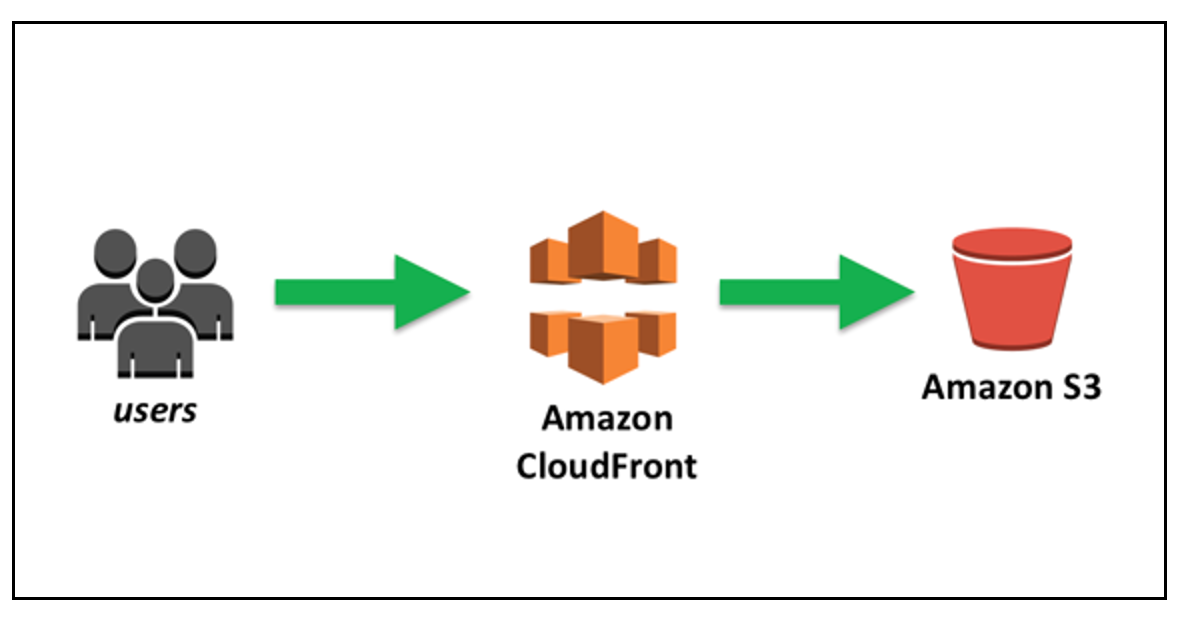
I use 3 AWS services for complain my goal: S3, CloudFront and AWS Certificate Manager
Create and configure S3 bucket
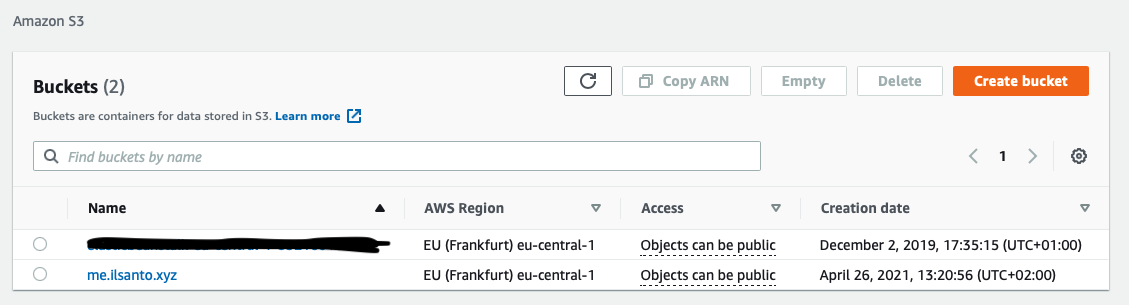
On AWS S3 console I create new bucket with my site name (me.ilsanto.xyz) then I set AWS region as eu-central-1 and enable Amazon S3 key (SSE-S3) Server-side encryption.
Modify bucket policy to public. This permit access from CloudFront as I haven’t its ID yet.
1 | { |
This is the space where later I’ll add static html file.
I write down “Bucket website endpoint” under Static website hosting.
Configure CloudFront distribution
What is CloudFront?
CloudFront is a web service that speed up web content such as html and other static file.
It deliver content on worldwide datacenter that provides the lowest latency. Content are delivered as fast as possible!
How I deploy distribution
Now that there’s a bucket, I create a new distribution on CloudFront console as following:
- Origin Domain Name: the Bucket website endpoint
- Viewer Protocol Policy: Redirect HTTP to HTTPS
- Cache and origin request settings: Use a cache policy and origin request policy
- Cache Policy: Managed-CachingOptimizated
- SSL Certificate: Default CloudFront Certificate (*.cloudfront.net). Later I’ll modify with custom ssl certificate
Now click one “Create Distribution” to deploy site distribution on AWS.
Modify DNS records
Now that I have distribution, I write down the Domain Name associated with my CloudFront distribution. This is necessary for the next steps
CNAME Alias
On my DNS maintainer (Hostinger), I have to create an alias CNAME that point to CloudFront domain name.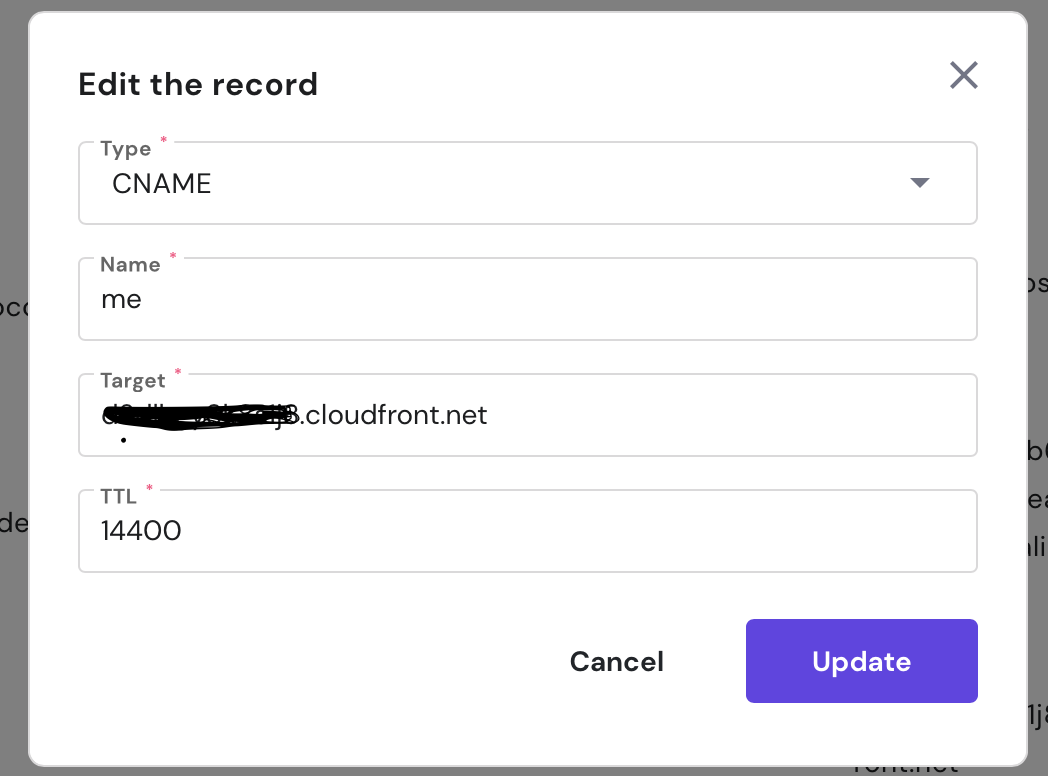
CAA record
AWS Certification creation needs CAA record to specify that it is allowed to issue a certificate for a domain or subdomain, so I create the CAA record as following:
- Type: CAA
- Name: @
- Flag: O (Specifies whether the value of the tag field is supported by ACM. Set this value to 0.)
- Tag: issue (Indicates that the Amazon Certificate Manager CA that you specify in the value field is authorized to issue a certificate for your domain or subdomain.).
- CA domain: “amazonaws.com”
Later I’ll return on DNS setting because it is necessary create a record for SSL certificate.
Create SSL certificate for my website
Now in CloudFront Distrubution I edit distribution setting under General, entering Alternate Domain Names me.ilsanto.xyz.
I select Custom SSL Certificate and Request or Import a Certificate with ACM
Under Domain name I enter me.ilsanto.xyz then click on Next.
The next step is related to domain validation. I choose the hard one: DNS validation. In this case I have to insert a new CNAME record on my domain DNS setting as proof of ownership.
After this point, certificate is created and it have been deployed on AWS.
Click on Yes Edit for save CloudFront settings.
I write down my CloudFront ID for next step.
Adjusting bucket policy
Now it’s time for permit bucket access to CloudFront only.
I return on S3 console and edit bucket policy under Permission with the following:
1 | { |
Result
After last deployment (about 15 minutes) I tested performance for my distribution.
On old Hostinger host, this was ping result:
1 | PING me.ilsanto.xyz (145.14.158.169) 56(84) bytes of data. |
Now on AWS:
1 | PING d3dlhgy8k8s1j8.cloudfront.net (99.86.161.84) 56(84) bytes of data. |
It’s 3 time more faster!!
Conclusion
With AWS I have a more faster website at free price (Free tier) and a ssl certificate included without a VPS maintenance and costs!